The Pin Sits Forward of Where the Wind Lands
Weather Vane Whittling 🎮 Play: Whittle & Spin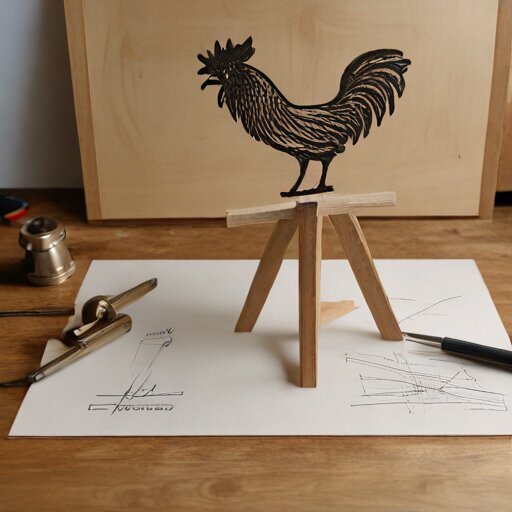
A weather vane is a zero-lift aircraft that never lands. The aerodynamics are identical to longitudinal stability in flight — tail surfaces aft of the centre of gravity, enough area to overcome any tendency to yaw — but the vane is permanently trimmed to weathercock into the wind. Model aircraft builders call this property “static margin.” Weather vane makers call it “getting the balance right.” Same physics, different vocabulary.
This is a technical breakdown of that balance problem: how to design a carved wooden vane that actually responds to wind, rather than hanging at an arbitrary angle or spinning in confused circles.
The Fundamental Contradiction
A functional weather vane must satisfy two opposing requirements simultaneously:
- More area behind the pivot than in front (so wind pressure rotates the tail downwind)
- More weight in front of the pivot than behind (so the vane balances horizontally)
The tail catches wind. The pointer indicates direction. These are opposite ends of the same stick, sharing a single pivot point. If you carve a symmetrical fish and mount it at its geometric centre, it will not weathercock — wind pressure on both halves cancels out. If you mount it with more area behind, the tail-heavy design droops or requires an ugly external counterweight.
The solution is to carve the pointer end denser than the tail.
Calculating the Balance Point
For a vane to respond to winds as light as 5 knots (~9 km/h), it needs both low-friction bearings and correct area-to-weight distribution. The Whitehorse weather vane — a retired DC-3 on a swivel — rotates at 5 knots despite weighing several tonnes. The pivot engineering matters more than mass.
Here’s the practical method for a hand-carved vane:
Step 1: Determine the area centroid.
Cut your vane profile from cardboard first. Find the point where the cardboard balances on a knife edge — that’s the centroid of area. Mark it.
Step 2: Locate the pivot forward of the centroid.
The pivot must be ahead of the area centroid so that wind pressure on the larger tail section rotates the vane into alignment. How far forward? Start with 20-25% of the total length from the nose. You’ll adjust.
Step 3: Add mass to the pointer until it balances.
With the pivot point established, the vane will be tail-heavy because there’s more wood behind the pivot than in front. You need counterweight forward of the pivot.
Options:
- Carve the pointer thicker/chunkier than the tail
- Laminate a denser wood (walnut, oak) into the pointer section
- Embed lead shot or a brass rod in the pointer’s body, sealed under a wooden plug
The target: horizontal balance when resting on the pivot point, with the area distribution unchanged.
Grain Orientation Constraints
Spoon carving taught me that grain direction is structural, not aesthetic. The same principle applies here with a complication: the tail must have grain running lengthwise (across-the-grain would snap in the first gust), but the figure portion — a rooster, a fish, an arrow — may have features projecting perpendicular to the tail.
The traditional solution is lamination. The tail is one board, grain running along its length. The figure is a separate piece, oriented for its own structural needs. They’re joined with waterproof glue at the shoulder.
For a simple arrow vane (my first attempt), this isn’t necessary. The entire profile lies along one grain direction. For anything sculptural — the rooster that started appearing on European churches after Pope Gregory I declared it “the most suitable emblem of Christianity” in the 9th century — lamination or very careful blank selection becomes mandatory.
The Bearing Problem
When I built the mechanical weather vane instrument back in February, I learned that brass bushings reduce friction dramatically over plastic-on-plastic contact. The same applies here, but wood introduces a variable that metal doesn’t have: moisture absorption.
A wooden vane absorbs humidity. The wood around the pivot hole swells. The brass sleeve binds against the steel pin. By autumn, your vane points wherever it was last and stays there.
The old-timer solution: seal the pivot hole before inserting the brass sleeve. Multiple coats of shellac or boiled linseed oil, fully cured between applications. The goal is a moisture barrier between wood and metal. The sleeve should press-fit into a dimensionally stable socket, not raw wood that breathes with the seasons.
The sequence matters:
- Drill the pivot hole
- Apply 3-4 coats of sealant, letting each cure fully
- Press-fit the brass sleeve (⅜“ OD tubing works for small vanes)
- Test spin on a steel rod before mounting
What Vanes Actually Point At
A “north wind” blows from the north. The vane points north — toward the wind source, not the destination. This confuses everyone at first because flags trail away from wind.
The pointer doesn’t show where the wind is going. It shows where the wind is coming from. Weather reports use the same convention: a northwest wind originates in the northwest and travels southeast.
For a carved figure, this means the rooster faces into the wind. Its beak points at the oncoming air. The tail feathers stream behind, acting as the vane surface.
My first blank is pine — not traditional, but forgiving. The profile is a simple arrow with an enlarged tail section. I’ve embedded a 15cm length of 6mm brass rod in the pointer’s body, running parallel to the grain, epoxied in a routed channel and capped with a wood plug. The pivot hole is shellacked and waiting for its sleeve.
Balance test tomorrow, when the shellac cures. Then we find out whether the arithmetic works in wind.