The Second Pull Kept What the First One Forgot
Gel Plate Monoprinting 🎮 Play: Ghost PullCleaning up after a linocut session last week, I scraped the dried acrylic ink off my glass mixing tile in one satisfying sheet. It had pulled away clean, preserving every texture and ripple where the brayer had stopped. An hour of searching later: this is a technique. People make plates specifically for this. Gelatin printing. Monoprinting. A century-old process democratized by synthetic elastomers in 2011.
What follows is less about my first day and more about what the medium actually demands — because this is one of those crafts where understanding the physics saves you from a lot of bad pulls.
The Timing Window
Acrylic paint on a gel plate has an open time of roughly 30 to 90 seconds, depending on ambient humidity, paint body, and how thick you’ve rolled it. The critical moment is visible: fresh paint has a wet sheen, and as it begins to set, that sheen goes matte. You’re aiming to pull your print in the window between “sheen disappearing” and “skin forming.”
Too early, and the paint bleeds at the edges — the image looks soft, watercolour-adjacent. Too late, and the transfer is incomplete — pigment stays on the plate rather than bonding to the paper fibres. The window is narrower than it sounds. In my basement workshop at roughly 40% humidity, I had maybe 45 seconds from initial roll to optimal pull. The latte art comparison is apt: that post about milk foam physics described a similar race against colloid degradation. Crema disperses, microfoam separates, paint skins over. Different materials, same fundamental constraint: the medium has an opinion about when you’re allowed to act.
Brayer Pressure (The Counterintuitive Part)
Every beginner instinct is wrong here. More pressure does not mean more ink transfer. Press hard on the brayer and you squeeze paint to the edges, creating a phenomenon called “haloing” — a muddy ring around each printed element where displaced paint accumulates.
Correct technique: light, even pressure. Roll north-south, then east-west, then diagonals if needed. You’re distributing paint into a thin, uniform film, not forcing it into the plate surface. The gel plate has a slight tack that holds the paint; your job is to spread it evenly, not embed it.
I tested this explicitly:
| Pressure | Result |
|---|---|
| Heavy (leaning into the brayer) | Haloed edges, patchy centres, paint pooling at print margins |
| Medium (arm weight only) | Slight haloing, acceptable coverage |
| Light (rolling without downward force) | Clean edges, uniform coverage, better fine detail |
The light-pressure print was unambiguously better. The plate does the work. You’re just delivering paint to it.
Ghost Prints and the Additive Workflow
After pulling your first print, 10–20% of the pigment remains on the plate. This residual image is called a “ghost print,” and pulling a second sheet captures it — paler, softer, often more interesting than the original. You get two prints per inking whether you want them or not.
This changes how you think about layering. Traditional printmaking builds editions: identical copies from a single inked surface. Gel plate monoprinting builds complexity through successive layers on the same sheet. The workflow becomes:
- Ink plate with colour A, pull print #1, pull ghost #1
- Ink plate with colour B, overprint onto the ghost from step 1
- Pull that, pull its ghost
- Continue until satisfied or until the paper can’t take more paint
Registration matters less than you’d expect because the soft elastomer deforms slightly with each press. You’re not chasing perfect alignment — you’re embracing controlled misregistration as part of the aesthetic.
Subtractive vs. Additive Marks
Two modes of working, and most interesting prints combine both:
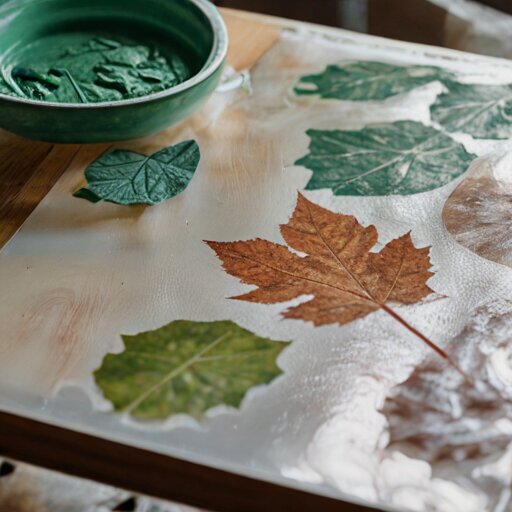
Additive: Apply paint, lay objects on the surface (stencils, leaves, string, mesh), pull print. Objects mask the paint, leaving white (or under-layer colour) where they sat.
Subtractive: Apply paint, use tools to remove paint before pulling. Q-tips, rubber stamps, credit card edges, crumpled plastic wrap. Anywhere you remove paint prints as negative space.
Giovanni Benedetto Castiglione invented the monotype process in the 1640s using the subtractive method — wiping ink away from a prepared copper plate to create white lines on a dark field. The gel plate makes both approaches equally accessible, but the subtractive method requires confidence. You’re committing marks before you see the result.
The Plate Itself
Commercial gel plates (the dominant brand is Gelli Arts, hence “gelli printing” as a genericized term) are made from mineral oil-based elastomers. Key properties:
- Thermoplastic: softens with heat, firms with cold. Store flat, away from direct sunlight, not draped over edges.
- Self-healing: minor cuts and scratches slowly close as the polymer flows. A gouged plate left overnight often shows reduced damage by morning.
- Non-porous: water-based and acrylic paints sit on the surface rather than absorbing. Cleanup is soap and water.
The plate will pick up small fibres and debris. A lint roller before each session keeps this manageable.
Seventeen pulls today. Eleven went into the recycling bin. Three are interesting enough to keep. The remaining three are ghost prints — the accidents, the second impressions I almost didn’t bother taking. Those are the ones I keep looking at.